Previous
Deploy model
Inference is the process of generating output from a machine learning (ML) model.
You can run inference locally on a Viam machine, or remotely in the Viam cloud.
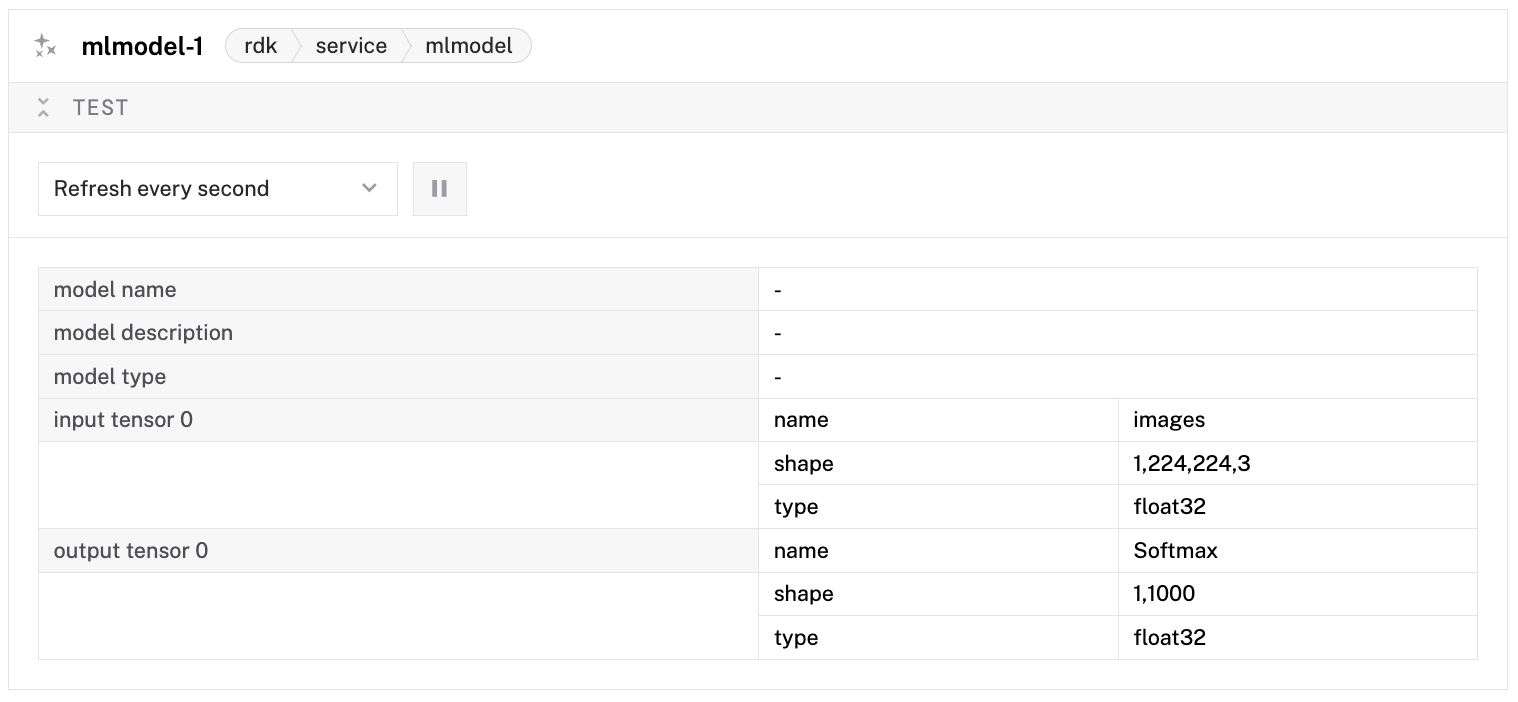
When you have deployed an ML model on your machine, you can run inference on your machine directly with the ML model service or using a vision service that interprets the inferences.
Entry-level devices such as the Raspberry Pi 4 can run small ML models, such as TensorFlow Lite (TFLite). More powerful hardware, including the Jetson Xavier or Raspberry Pi 5 with an AI HAT+, can process larger models, including TensorFlow and ONNX. If your hardware does not support the model you want to run, see Cloud inference.

The following code passes an image to an ML model service, and uses the Infer method to make inferences:
import asyncio
import numpy as np

from PIL import Image
from viam.components.camera import Camera
from viam.media.utils.pil import viam_to_pil_image
from viam.robot.client import RobotClient
from viam.services.mlmodel import MLModelClient

# Configuration constants – replace with your actual values
API_KEY = ""  # API key, find or create in your organization settings
API_KEY_ID = ""  # API key ID, find or create in your organization settings
MACHINE_ADDRESS = ""  # the address of the machine you want to capture images from
ML_MODEL_NAME = ""  # the name of the ML model you want to use
CAMERA_NAME = ""  # the name of the camera you want to capture images from


async def connect_machine() -> RobotClient:
    """Establish a connection to the robot using the robot address."""
    machine_opts = RobotClient.Options.with_api_key(
        api_key=API_KEY,
        api_key_id=API_KEY_ID
    )
    return await RobotClient.at_address(MACHINE_ADDRESS, machine_opts)

async def main() -> int:
    machine = await connect_machine()

    camera = Camera.from_robot(machine, CAMERA_NAME)
    ml_model = MLModelClient.from_robot(machine, ML_MODEL_NAME)

    # Get ML model metadata to understand input requirements
    metadata = await ml_model.metadata()

    # Capture image
    image_frame = await camera.get_image()

    # Convert ViamImage to PIL Image first
    pil_image = viam_to_pil_image(image_frame)
    # Convert PIL Image to numpy array
    image_array = np.array(pil_image)

    # Get expected input shape from metadata
    expected_shape = list(metadata.input_info[0].shape)
    expected_dtype = metadata.input_info[0].data_type
    expected_name = metadata.input_info[0].name

    if not expected_shape:
        print("No input info found for 'image'")
        return 1

    if len(expected_shape) == 4 and expected_shape[0] == 1 and expected_shape[3] == 3:
        expected_height = expected_shape[1]
        expected_width = expected_shape[2]

        # Resize to expected dimensions
        if image_array.shape[:2] != (expected_height, expected_width):
            pil_image_resized = pil_image.resize((expected_width, expected_height))
            image_array = np.array(pil_image_resized)
    else:
        print(f"Unexpected input shape format.")
        return 1

    # Add batch dimension and ensure correct shape
    image_data = np.expand_dims(image_array, axis=0)

    # Ensure the data type matches expected type
    if expected_dtype == "uint8":
        image_data = image_data.astype(np.uint8)
    elif expected_dtype == "float32":
        # Convert to float32 and normalize to [0, 1] range
        image_data = image_data.astype(np.float32) / 255.0
    else:
        # Default to float32 with normalization
        image_data = image_data.astype(np.float32) / 255.0

    # Create the input tensors dictionary
    input_tensors = {
        expected_name: image_data
    }

    output_tensors = await ml_model.infer(input_tensors)
    print(f"Output tensors:")
    for key, value in output_tensors.items():
        print(f"{key}: shape={value.shape}, dtype={value.dtype}")

    await machine.close()
    return 0

if __name__ == "__main__":
    asyncio.run(main())
The following code passes an image to an ML model service, and uses the Infer method to make inferences:
package main

import (
	"bytes"
	"context"
	"fmt"
	"image"
	"image/jpeg"

	"gorgonia.org/tensor"

	"go.viam.com/rdk/logging"
	"go.viam.com/rdk/ml"
	"go.viam.com/rdk/robot/client"
	"go.viam.com/rdk/components/camera"
	"go.viam.com/rdk/services/mlmodel"
	"go.viam.com/rdk/utils"
	"go.viam.com/utils/rpc"
)

func main() {
	apiKey := ""
	apiKeyID := ""
	machineAddress := ""
	mlModelName := ""
	cameraName := ""


	logger := logging.NewDebugLogger("client")
	ctx := context.Background()

	machine, err := client.New(
		context.Background(),
		machineAddress,
		logger,
		client.WithDialOptions(rpc.WithEntityCredentials(
			apiKeyID,
			rpc.Credentials{
				Type:    rpc.CredentialsTypeAPIKey,
				Payload: apiKey,
			})),
	)
	if err != nil {
		logger.Fatal(err)
	}

	// Capture image from camera
	cam, err := camera.FromRobot(machine, cameraName)
	if err != nil {
		logger.Fatal(err)
	}

	imageData, _, err := cam.Image(ctx, utils.MimeTypeJPEG, nil)
	if err != nil {
		logger.Fatal(err)
	}

	// Decode the image data to get the actual image
	img, err := jpeg.Decode(bytes.NewReader(imageData))
	if err != nil {
		logger.Fatal(err)
	}

	// Get ML model metadata to understand input requirements
	mlModel, err := mlmodel.FromRobot(machine, mlModelName)
	if err != nil {
		logger.Fatal(err)
	}

	metadata, err := mlModel.Metadata(ctx)
	if err != nil {
		logger.Fatal(err)
	}

	// Get expected input shape and type from metadata
	var expectedShape []int
	var expectedDtype tensor.Dtype
	var expectedName string

	if len(metadata.Inputs) > 0 {
		inputInfo := metadata.Inputs[0]
		expectedShape = inputInfo.Shape
		expectedName = inputInfo.Name

		// Convert data type string to tensor.Dtype
		switch inputInfo.DataType {
		case "uint8":
			expectedDtype = tensor.Uint8
		case "float32":
			expectedDtype = tensor.Float32
		default:
			expectedDtype = tensor.Float32 // Default to float32
		}
	} else {
		logger.Fatal("No input info found in model metadata")
	}

	// Resize image to expected dimensions
	bounds := img.Bounds()
	width := bounds.Dx()
	height := bounds.Dy()

	// Extract expected dimensions
	if len(expectedShape) != 4 || expectedShape[0] != 1 || expectedShape[3] != 3 {
		logger.Fatal("Unexpected input shape format")
	}

	expectedHeight := expectedShape[1]
	expectedWidth := expectedShape[2]

	// Create a new image with the expected dimensions
	resizedImg := image.NewRGBA(image.Rect(0, 0, expectedWidth, expectedHeight))

	// Simple nearest neighbor resize
	for y := 0; y < expectedHeight; y++ {
		for x := 0; x < expectedWidth; x++ {
			srcX := x * width / expectedWidth
			srcY := y * height / expectedHeight
			resizedImg.Set(x, y, img.At(srcX, srcY))
		}
	}

	// Convert image to tensor data
	tensorData := make([]float32, 1*expectedHeight*expectedWidth*3)
	idx := 0

	for y := 0; y < expectedHeight; y++ {
		for x := 0; x < expectedWidth; x++ {
			r, g, b, _ := resizedImg.At(x, y).RGBA()

			// Convert from 16-bit to 8-bit and normalize to [0, 1] for float32
			if expectedDtype == tensor.Float32 {
				tensorData[idx] = float32(r>>8) / 255.0   // R
				tensorData[idx+1] = float32(g>>8) / 255.0 // G
				tensorData[idx+2] = float32(b>>8) / 255.0 // B
			} else {
				// For uint8, we need to create a uint8 slice
				logger.Fatal("uint8 tensor creation not implemented in this example")
			}
			idx += 3
		}
	}

	// Create input tensor
	var inputTensor tensor.Tensor
	if expectedDtype == tensor.Float32 {
		inputTensor = tensor.New(
			tensor.WithShape(1, expectedHeight, expectedWidth, 3),
			tensor.WithBacking(tensorData),
			tensor.Of(tensor.Float32),
		)
	} else {
		logger.Fatal("Only float32 tensors are supported in this example")
	}

	// Convert tensor.Tensor to *tensor.Dense for ml.Tensors
	denseTensor, ok := inputTensor.(*tensor.Dense)
	if !ok {
		logger.Fatal("Failed to convert inputTensor to *tensor.Dense")
	}

	inputTensors := ml.Tensors{
		expectedName: denseTensor,
	}

	outputTensors, err := mlModel.Infer(ctx, inputTensors)
	if err != nil {
		logger.Fatal(err)
	}

	fmt.Printf("Output tensors: %v\n", outputTensors)

	err = machine.Close(ctx)
	if err != nil {
		logger.Fatal(err)
	}
}
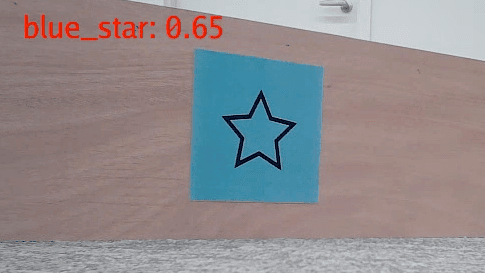
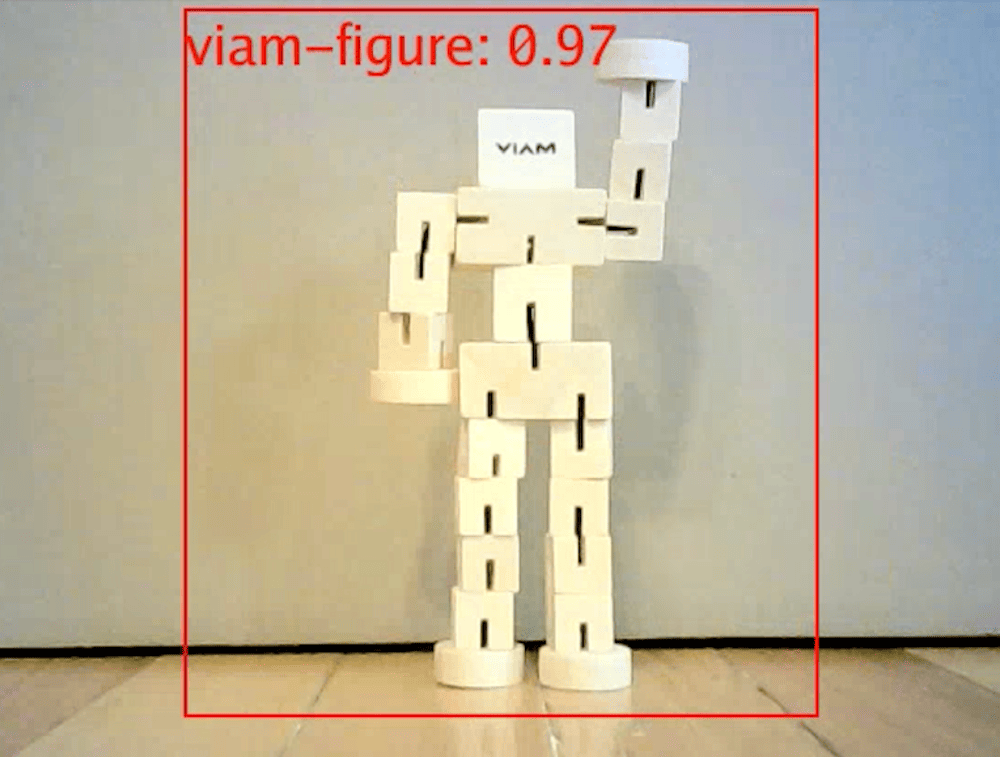
There are a range of vision services that interpret images. Some vision services apply an ML model to a stream of images from a camera to:
To use a vision service:
Visit your machine’s CONFIGURE or CONTROL page.
Expand the TEST area of the vision service panel.
The feed shows an overlay of detected objects or classifications on top of a live camera feed.


The following code passes an image from a camera to a vision service and uses the GetClassifications method:
import asyncio
import numpy as np

from PIL import Image
from viam.components.camera import Camera
from viam.media.utils.pil import viam_to_pil_image
from viam.robot.client import RobotClient
from viam.services.vision import VisionClient

# Configuration constants – replace with your actual values
API_KEY = ""  # API key, find or create in your organization settings
API_KEY_ID = ""  # API key ID, find or create in your organization settings
MACHINE_ADDRESS = ""  # the address of the machine you want to capture images from
CLASSIFIER_NAME = ""  # the name of the classifier you want to use
CAMERA_NAME = ""  # the name of the camera you want to capture images from


async def connect_machine() -> RobotClient:
    """Establish a connection to the robot using the robot address."""
    machine_opts = RobotClient.Options.with_api_key(
        api_key=API_KEY,
        api_key_id=API_KEY_ID
    )
    return await RobotClient.at_address(MACHINE_ADDRESS, machine_opts)

async def main() -> int:
    machine = await connect_machine()

    camera = Camera.from_robot(machine, CAMERA_NAME)
    classifier = VisionClient.from_robot(machine, CLASSIFIER_NAME)

    # Capture image
    image_frame = await camera.get_image(mime_type="image/jpeg")

    # Get tags using the ViamImage (not the PIL image)
    tags = await classifier.get_classifications(
        image=image_frame, image_format="image/jpeg", count=2)

    await machine.close()
    return 0

if __name__ == "__main__":
    asyncio.run(main())
The following code passes an image from a camera to a vision service and uses the GetClassifications method:
package main

import (
	"context"
	"fmt"
	"image/jpeg"
	"bytes"

	"go.viam.com/rdk/logging"
	"go.viam.com/rdk/robot/client"
	"go.viam.com/rdk/services/vision"
	"go.viam.com/rdk/components/camera"
	"go.viam.com/rdk/utils"
	"go.viam.com/utils/rpc"
)

func main() {
	apiKey := ""
	apiKeyID := ""
	machineAddress := ""
	classifierName := ""
	cameraName := ""


	logger := logging.NewDebugLogger("client")
	ctx := context.Background()

	machine, err := client.New(
		context.Background(),
		machineAddress,
		logger,
		client.WithDialOptions(rpc.WithEntityCredentials(
			apiKeyID,
			rpc.Credentials{
				Type:    rpc.CredentialsTypeAPIKey,
				Payload: apiKey,
			})),
	)
	if err != nil {
		logger.Fatal(err)
	}

	// Capture image from camera
	cam, err := camera.FromRobot(machine, cameraName)
	if err != nil {
		logger.Fatal(err)
	}

	imageData, _, err := cam.Image(ctx, utils.MimeTypeJPEG, nil)
	if err != nil {
		logger.Fatal(err)
	}

	// Convert binary data to image.Image
	img, err := jpeg.Decode(bytes.NewReader(imageData))
	if err != nil {
		logger.Fatal(err)
	}

	// Get classifications using the image
	classifier, err := vision.FromRobot(machine, classifierName)
	if err != nil {
		logger.Fatal(err)
	}

	classifications, err := classifier.Classifications(ctx, img, 2, nil)
	if err != nil {
		logger.Fatal(err)
	}

	err = machine.Close(ctx)
	if err != nil {
		logger.Fatal(err)
	}
}
The following code passes an image from a camera to a vision service and uses the GetClassifications method:
import { createRobotClient, RobotClient, VisionClient, CameraClient } from "@viamrobotics/sdk";

// Configuration constants – replace with your actual values
let API_KEY = "";  // API key, find or create in your organization settings
let API_KEY_ID = "";  // API key ID, find or create in your organization settings
let MACHINE_ADDRESS = "";  // the address of the machine you want to capture images from
let CLASSIFIER_NAME = "";  // the name of the classifier you want to use
let CAMERA_NAME = "";  // the name of the camera you want to capture images from

async function connectMachine(): Promise<RobotClient> {
    // Establish a connection to the robot using the machine address
    return await createRobotClient({
        host: MACHINE_ADDRESS,
        credentials: {
          type: 'api-key',
          payload: API_KEY,
          authEntity: API_KEY_ID,
        },
        signalingAddress: 'https://app.viam.com:443',
      });
}

async function main(): Promise<number> {
    const machine = await connectMachine();
    const camera = new CameraClient(machine, CAMERA_NAME);
    const classifier = new VisionClient(machine, CLASSIFIER_NAME);

    // Capture image
    const imageFrame = await camera.getImage();

    // Get tags using the image
    const tags = await classifier.getClassifications(
        imageFrame,
        imageFrame.width ?? 0,
        imageFrame.height ?? 0,
        imageFrame.mimeType ?? "",
        2
    );

    return 0;
}

main().catch((error) => {
    console.error("Script failed:", error);
    process.exit(1);
});
Cloud inference enables you to run machine learning models in the Viam cloud, instead of on a local machine. Cloud inference provides more computing power than edge devices, enabling you to run more computationally-intensive models or achieve faster inference times.
You can run cloud inference using any TensorFlow and TensorFlow Lite model in the Viam registry, including unlisted models owned by or shared with you.
To run cloud inference, you must pass the following:
You can obtain the binary data ID from the DATA tab and the organization ID by running the CLI command viam org list.
You can find the model information on the MODELS tab.
viam infer --binary-data-id <binary-data-id> --model-name <model-name> --model-org-id <org-id-that-owns-model> --model-version "2025-04-14T16-38-25" --org-id <org-id-that-executes-inference>
Inference Response:
Output Tensors:
  Tensor Name: num_detections
    Shape: [1]
    Values: [1.0000]
  Tensor Name: classes
    Shape: [32 1]
    Values: [...]
  Tensor Name: boxes
    Shape: [32 1 4]
    Values: [...]
  Tensor Name: confidence
    Shape: [32 1]
    Values: [...]
Annotations:
Bounding Box Format: [x_min, y_min, x_max, y_max]
  No annotations.
The command returns a list of detected classes or bounding boxes depending on the output of the ML model you specified, as well as a list of confidence values for those classes or boxes.
The bounding box output uses proportional coordinates between 0 and 1, with the origin (0, 0) in the top left of the image and (1, 1) in the bottom right.
For more information, see viam infer.
Was this page helpful?
Glad to hear it! If you have any other feedback please let us know:
We're sorry about that. To help us improve, please tell us what we can do better:
Thank you!